PART 2 - Telescope Challenges for Intermediate Users
March 21, 2016

So you’ve had your telescope for a while now and you’re ready to take it to the next level. Here is a list of challenges to learn and try for budding astrophotographers who have nailed the previous 13 things to do. As these suggestions are more advanced, certain equipment may been needed, such is the life of an astronomer! If one of these 13 appeals to you more than others you may like to specialise. Ok here we go :
1. Collimating Your Telescope

Check your telescopes manual, point at a bright star and make adjustments to your telescope to tune it’s collimation precisely. Doing this small calibration regularly keeps your optics sharp and makes focus and photographer clearer and easier. Without it, stars can appear oddly shaped and planetary work never comes out as sharp as it should.
2. Guiding on a Star

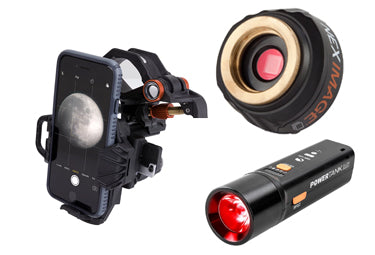
Guiding allows you to lock onto a star to send the mount sub-pixel corrections to stop the target from moving at all while taking a long exposure photo. Using a guidescope, or off-axis guider attachment, connect a small CMOS camera (like a Celestron Skyris or NexImage) to your computer and use PHD2 from openphdguiding.org to try.
3. Drift Align Polar Alignment

Using PHD2 from step one try to “Drift Alignment” Tool. Use a star on the E/W horizon to measure the drift in RA and make fine adjustments to reduce it. If the RA drift increases after an adjustment, adjust it in the opposite direction and re-measure. Then use a star near where the meridian and celestial equator meet to measure the drift on the DEC axis and adjust. Doing this gives you finely tuned and super accurate polar alignment which will improve your GOTO capability on your mount, but more importantly, allows very long exposures.
4. Take a 10 minute exposure

If you’ve got the first 3 steps down, this step should be a breeze! Now you’re ready for a deep exposure of a deep space object. If you can take a 10 or even 20 minute exposure, some of the fainter and more elusive deep space objects will be well within your grasp. DSLRs will need to be in bulb mode or tethered to a laptop, and CCD or CMOS cameras will need cooling for such long exposures. Try the Horsehead Nebula, The Rosette Nebula or Corona Australis Molecular Cloud for the Southern Hemisphere.
5. Take and Use Dark Frames

Put your telescope’s optics cover back on the front, but leave your camera gear connected and take 10 x 10 minute exposures and stack them. You’ll notice bright pixels on what should otherwise be a completely black image in theory. The telescope was closed! In reality, your camera will have inherent noise and bad pixels that should be subtracted from your “Lights” (normal exposures) using software such as Nebulosity or PixInsight. Keep your darks saved, they can be reused for months! Using darks will produce much higher quality images with less noise.
6. Use a Barlow Lens

Use a 2x, 2.5x or 5x magnifying barlow lens to photograph the moon or planets at twice the size or more than normal. Using a barlow makes the light a bit dimmer so you’ll need longer exposure times or gain to take a video on your camera. The results though, are like magic - now your scope is at least twice as powerful as before!
7. Photo Mosaic the Full Moon

Using a barlow, or if you scope has a strong magnification factor anyway the Moon should be bigger than you can photograph in one frame. Try taking several videos, or photos, of the moon in sections and use software like Photoshop’s “Photo merge” to stick the images together into a large high resolution image. For best results, stack each section and use the same processing steps for each stack before photomerging. Once done you should have a photo of the moon large enough to print as a poster!
8. Image the Moons Natural Colours

Take a good astrophoto of the moon using the stacking methods we learned about to achieve a smooth, noiseless image with a colour camera. Then stretch this image in your photo processing software using Levels, Curves and Saturation to reveal the chemical composition of the moon. Be careful, if you push it too far you can lose surface and edge details. The blue is titanium oxide and green is lithium. Seeing the moon in colour adds a whole other dimension to lunar photography, and not many people realise the moon is colour at all!
9. Imaging a Deep Space Galaxy

Galaxies aren’t as bright as some of the easier nebulas and are often much smaller. Using everything you’ve learned so far, try to take several long exposures of a galaxy, calibrate your images with dark frames and stack them into a final image. Popular targets include Andromeda, Sombrero Galaxy, Pinwheel Galaxy and The Silver Dollar Galaxy. In the Southern Hemisphere you can also try the Large or Small Magellanic Clouds, these exceptions like Andromeda are too large to fit in the field of view of more powerful telescopes!
10. Using Narrowband and Colour Filters

If you’re not using a colour camera, you’ve probably already become familiar with shooting separate R, G and B images to combine them into a colour image. This method will aways give you a 66% more detailed image than using a colour camera. A filter wheel is ideal for using filters, and Ha (Hydrogen Alpha) is a great filter to try for both Galaxies and Nebulas. It will reveal the hydrogen rich red areas as well as cut through light pollution or moonlight. Practice taking Ha frames and adding them to the “Red” channel in your image processing for really professional levels of detail and colour.
11. Capture an ISS Transit

Using Calsky.org, find a centreline for viewing a transit of the International Space Station across the disk of the Sun or the Moon. Using precise timing, burst mode for DSLRs or high speed video for CMOS cameras, try to record the exact moment the ISS passes. If everything works you’ll capture the man made space laboratory in stark contrast with the sphere behind it!
12. Stack a Comet with No Trails

You may have already taken comet photos, so probably already know that depending on your tracking, either the stars, or the comet streak and trail during a long exposure. Try doing 2 sets of exposures on a comet - One tracking the stars, and one tracking the comet itself by guiding on the comet head. Use PixInsight or Deep Sky Stacker (free) which include comet stacking tools to blend these sets together so nothing streaks at all in the final image.
13. Make a “Hubble” Palette Narrowband Image

Using Ha, OIII and S2 separately, acquire and stack many exposures to create 3 images of a nebula. Map the Hydrogen stack to the GREEN channel in photoshop or other software. Map OxygenIII to BLUE and SulphurII to RED. You should end up with a “false colour” image reminiscent of some narrowband work from the famous space telescope! Though the colours aren’t what your eyes would see, they show otherwise hidden structures with real scientific value for their chemistry and composition.
Congratulations! If you’ve achieved even half of these things you are probably addicted, broke and putting together a nice little collection of memories from space. These intermediate steps will put you on a path to publication grade astrophotos, but don’t forget to share your progress with your friends online and your friends at Celestron with the hashtag #celestronrocks .
Stay tuned for Part 3… Advanced Amateur Astronomy, not an oxymoron!

