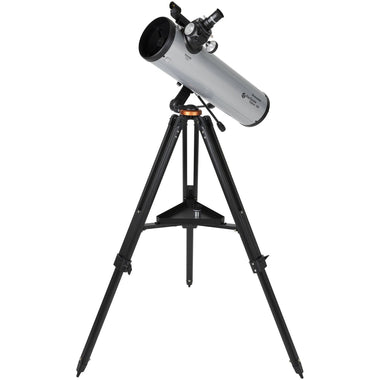
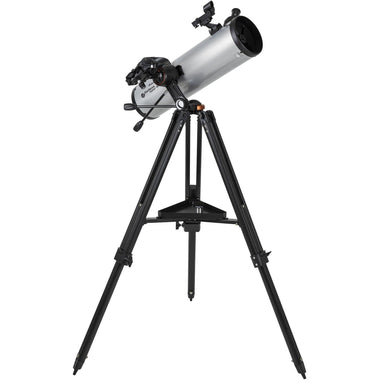
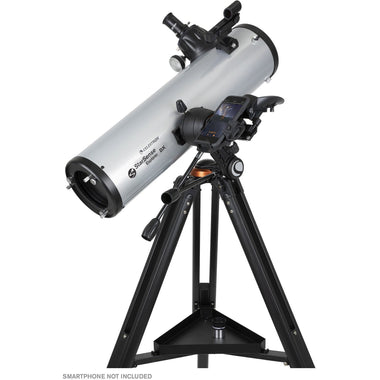
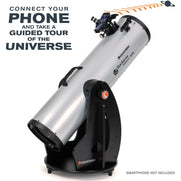
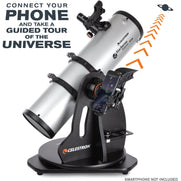
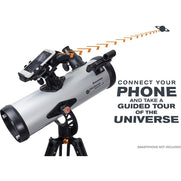
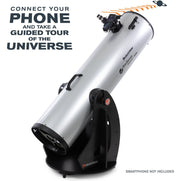
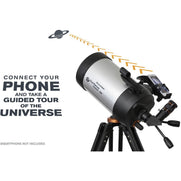
StarSense Explorer DX 130AZ Smartphone App-Enabled Newtonian Reflector Telescope
$499.95
In StockContiguous USA only
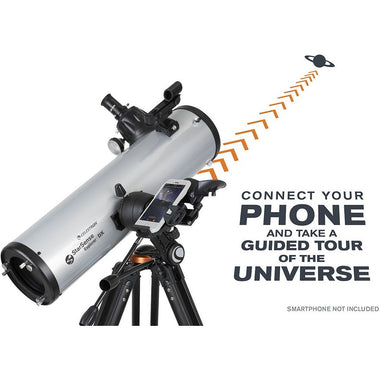
- Unleash the power of your smartphone to take you on a guided tour of the night sky—no telescope experience required.
- Award-winning and patented StarSense sky recognition technology uses your smartphone to analyze star patterns overhead and calculate its position in real time.
- StarSense Explorer Powered by SkySafari™ app automatically generates a list of objects currently visible. View planets, brighter nebulae and galaxies, star clusters, and double stars from the city. Or take your telescope to darker skies to view faint, deep sky objects.
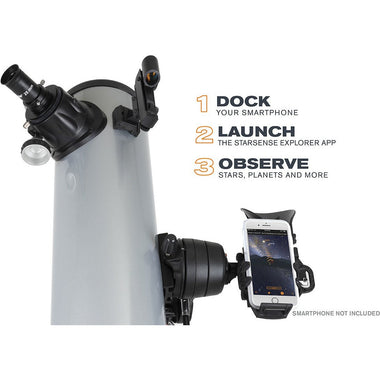
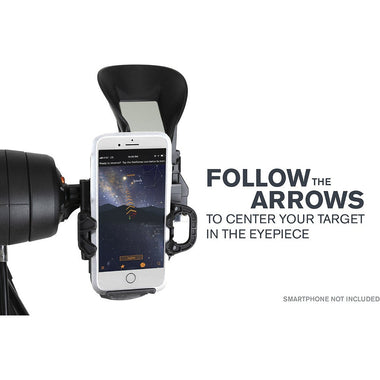
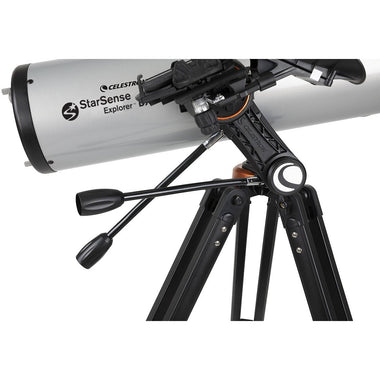
- Manual altazimuth mount with smooth, dual-axis slow-motion controls makes it easy to follow the on-screen arrows to your desired target. When the bullseye turns green, it’s ready to view in the telescope’s eyepiece.
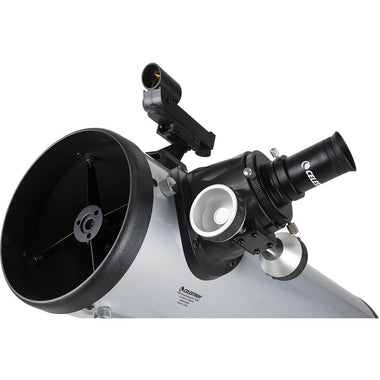
- 130mm (5”) Newtonian reflector with highly reflective coatings and enough light gathering ability to view all the best celestial objects.
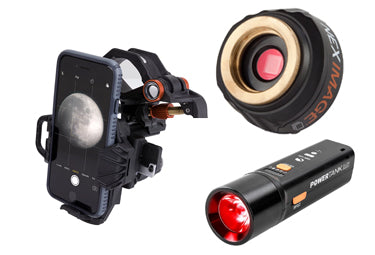
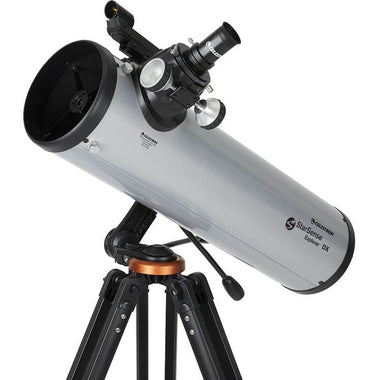
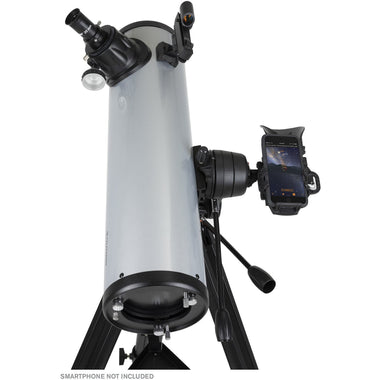
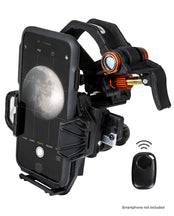
- Includes 25mm and 10mm eyepieces, StarSense smartphone dock, a red dot finderscope (in case you want to use the telescope without your phone), and a sturdy, full-height tripod.
Overview
- Unleash the power of your smartphone to take you on a guided tour of the night sky—no telescope experience required.
- Award-winning and patented StarSense sky recognition technology uses your smartphone to analyze star patterns overhead and calculate its position in real time.
- StarSense Explorer Powered by SkySafari™ app automatically generates a list of objects currently visible. View planets, brighter nebulae and galaxies, star clusters, and double stars from the city. Or take your telescope to darker skies to view faint, deep sky objects.
- Manual altazimuth mount with smooth, dual-axis slow-motion controls makes it easy to follow the on-screen arrows to your desired target. When the bullseye turns green, it’s ready to view in the telescope’s eyepiece.
- 130mm (5”) Newtonian reflector with highly reflective coatings and enough light gathering ability to view all the best celestial objects.
- Includes 25mm and 10mm eyepieces, StarSense smartphone dock, a red dot finderscope (in case you want to use the telescope without your phone), and a sturdy, full-height tripod.
Description
Celestron has reinvented the manual telescope with StarSense Explorer—the first telescope that uses your smartphone to analyze the night sky and calculate its position in real time. StarSense Explorer is ideal for beginners thanks to the app’s user-friendly interface and detailed tutorials. It’s like having your own personal tour guide of the night sky.
Dock, Launch, Explore
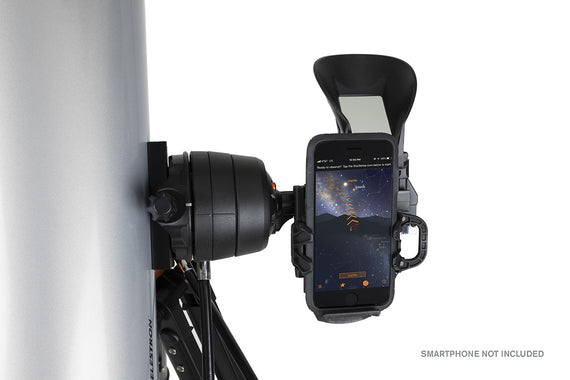
Leave complicated star charts, imprecise planetarium apps, and computerized mounts behind. With StarSense Explorer, locating objects has never been easier, faster, or more accurate. Within minutes of setting up the telescope, you’ll be navigating the sky with confidence. Simply place your phone in the unique StarSense dock and launch the StarSense Explorer app. After aligning your phone to the telescope’s optics (a quick, 2-minute procedure), StarSense Explorer generates a list of celestial objects currently visible. Make your selection and arrows appear onscreen, guiding you as you to move the telescope. When the object is ready to view, the bullseye turns green.
Smartphone Compatibility
StarSense Explorer works with most modern smartphones, including iPhone 6 and up and most devices running Android 7.1.2 or later manufactured since 2016. For a complete compatibility list, click here.
Patented StarSense Sky Recognition Technology
StarSense Explorer uses patented technology and your smartphone to determine exactly where the telescope is pointed in the night sky. A Lost in Space Algorithm (LISA), like the ones satellites use in orbit to correctly orient themselves, helps the app match star patterns it detects overhead to its internal database.
While other astronomy apps may claim that they can help you find objects, they rely exclusively on the phone’s gyros and accelerometers, which aren’t as accurate as LISA technology. No other app can accurately tell you when your target is visible in the eyepiece.
High Quality Altazimuth Mount with Slow Motion Control
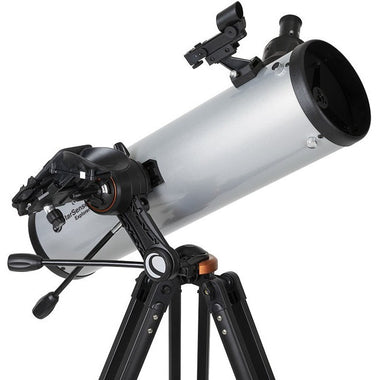
An ultra-stable altazimuth mount provides a sturdy foundation for StarSense Explorer DX. Slip clutches and geared slow motion controls in both axes help you move the telescope smoothly and zero in your target. As celestial objects appear to drift across the night sky, you’ll be able to follow them with just a few turns of the knobs. It’s all anchored by an adjustable, full-height tripod.
Dazzling Views with High Quality Optics
With a large 130mm (5”) objective lens, this telescope has enough light gathering ability to bring out impressive detail in celestial objects. You can expect sharp, bright views of Jupiter’s four Galilean moons, its cloud bands and Great Red Spot, the rings of Saturn, the trapezium in the Orion Nebula, and beautiful Pleiades Open Star Cluster. Highly reflective coatings on both the primary and secondary mirror enhance the views even more.
Perfect for the City or Dark Sky Sites
Even if you live in a light polluted city location, StarSense Explorer is advanced enough to be able to pick out Jupiter, Saturn, Venus, the Orion Nebula, double stars, and a few more of the most famous celestial objects.
But if you can take the telescope to an even slightly darker location, more objects will become visible. With this 5” Newtonian and relatively dark skies, the Andromeda Galaxy, Hercules Open Star Cluster, and so many more are easily within your reach.
The entire telescope kit weighs just 18 pounds, so it’s perfectly portable and easy to bring on your next camping trip or to a remote observing site.
Everything You Need to Observe Immediately
When you unbox your new StarSense Explorer DX, you’ll find:
- 130mm Newtonian reflector optical tube
- StarSense dock for your smartphone
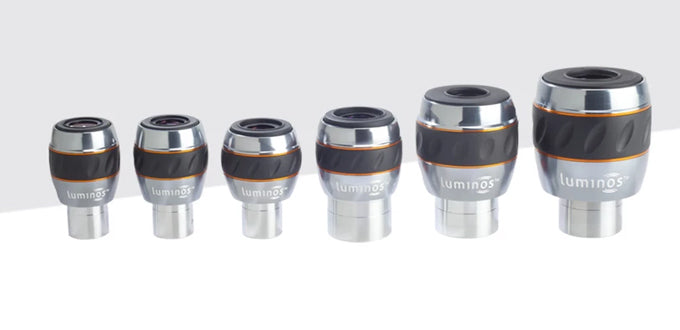
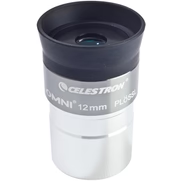
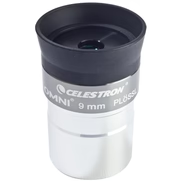
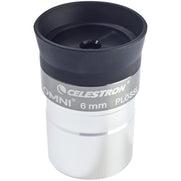
- Low powered (25mm) and high powered (10mm) eyepiece
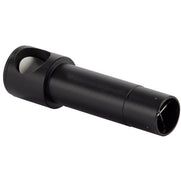
- StarPointer red dot finderscope, perfect for using the telescope during the day or without the StarSense Explorer app
- Altazimuth mount with slow motion controls
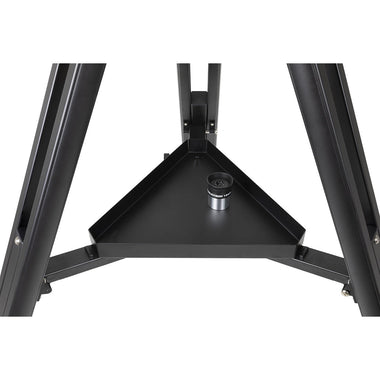
- Full-height tripod with an accessory tray to keep you organized
Specifications
| Optical Tube Info: | |
|---|---|
| Optical Design: | Newtonian Reflector | Parabolic Primary Mirror |
| Aperture: | 130mm (5.11") |
| Focal Length: | 650mm (25.59") |
| Focal Ratio: | f/5 |
| Focal Length of Eyepiece 1: | 25mm (0.98") |
| Magnification of Eyepiece 1: | 26x |
| Focal Length of Eyepiece 2: | 10mm (0.39") |
| Magnification of Eyepiece 2: | 65x |
| Barlow Lens: | Not Included |
| Finderscope: | StarPointer™ red dot finderscope |
| Optical Tube: | Steel |
| Highest Useful Magnification: | 307x |
| Lowest Useful Magnification: | 19x |
| Limiting Stellar Magnitude: | 13.1 |
| Resolution (Rayleigh): | 1.07 arc seconds |
| Resolution (Dawes): | .89 arc seconds |
| Light Gathering Power (Compared to human eye): | 345x |
| Secondary Mirror Obstruction: | 45mm (1.73") |
| Secondary Mirror Obstruction by Diameter: | 34% |
| Secondary Mirror Obstruction by Area: | 11% |
| Optical Coatings: | Glass mirrors coated with aluminum and SiO₂ |
| Optical Tube Length: | 635mm (25") |
| Optical Tube Diameter: | 165mm (6.49") |
| Optical Tube Weight: | 8.8 lbs (3.99 kg) |
| Dovetail: | CG-5 Dovetail Bar |
| Mount Info: | |
| Mount Type: | Manual Alt-Azimuth |
| Height adjustment range (includes mount and tripod): | Aluminum, 1244.6mm (49") max height |
| Tripod Leg Diameter: | N/A |
| Accessory Tray: | Yes |
| Tripod Weight: | 9.2 lbs (4.17 kg) |
| Slew Speeds: | Manual |
| GPS: | Uses phone's GPS |
| Dovetail Compatibility: | CG-5 Dovetail bar |
| Power Requirements: | None (Recommend PowerTank Glow to keep phone charged while using App) |
| Alignment Procedures: | Use StarSense Explorer App |
| Software: | StarSense Explorer App, SkyPortal App, and Celestron Starry Night Basic Edition Software |
| Total Kit Weight: | 18 lbs (8.16 kg) |
| Included Items: |
Optical tube Mount and tripod (preassembled) 25mm and 10mm eyepieces StarPointer finderscope Accessory tray StarSense Explorer phone dock |
| Solar Warning |
|
| California Residents | View Proposition 65 Warning WARNING: Cancer and Reproductive Harm - www.P65Warnings.ca.gov. |
Videos
Reviews
Edison Consumer Electronics & Information Technology’s Learning Technologies Gold Winner 2020
Celestron took gold! With over 3K entries worldwide, our StarSense Explorer won gold in the Edison Awards’ Learning Technologies category. StarSense Explorer has truly revolutionized amateur astronomy for the better.
Read Full ReviewIHS Markit ShowStoppers CES 2020 Innovation Award
Read Full ReviewIDA Design Award – Education/Teaching Aids Gold Winner 2019
Read Full ReviewIDA Design Award – Education/Self learning device Silver Winner 2019
Read Full ReviewNewsweek
It’s an irresistible proposition from amateur astronomers and other stargazers: Get the capabilities of a professional observatory in a telescope that costs less than $500
Read Full ReviewWired
If you’ve ever hunted for stars using a low-cost telescope, you’ll appreciate Celestron’s new StarSense Explorer telescopes.
Read Full ReviewPopular Science
One of my favorite products that I cam across today [CES Show Stopper] uses some of the simplest tech to achieve its purpose.
Read Full ReviewAccessories
FAQ
The phone dock on the StarSense Explorer DX mount does not appear to be installed correctly. What’s wrong?
The phone dock’s saddle on the StarSense Explorer DX mount is rotated 180 degrees for shipping to keep the screw from damaging the box in transit. You just need to rotate the saddle 180 degrees by hand so that the phone bracket is right side up. This will also make the saddle the correct orientation with the screw on top. Take off the bracket and scope for now and use the dovetail screw as a handle in the joint between your thumb and pointer finger. Apply pressure until you can rotate the screw up to the top. Now mount the phone dock and telescope and everything will work as it is supposed to.
I have an Android smartphone. How can I determine if it is compatible with StarSense Explorer?
The easiest way is to visit Celestron.com/sse with your smartphone’s web browser and run a compatibility check. Otherwise, you can go to the same webpage on your computer and view a list of tested Android smartphones. If your model is listed, your smartphone is compatible. If your model is not listed, it does not necessarily mean it is incompatible, just that it hasn’t been tested yet. In general, Android devices running Android 7.1.2 and higher that were manufactured in 2016 or later are usually compatible.
If you are still unsure, download the StarSense Explorer app from Google Play. When you open the app, it will indicate compatibility.
I moved the telescope so that the bullseye was on top of the selected object and the bullseye turned green. But I can’t see anything in the telescope’s eyepiece. What’s going on?
One of two things could potentially be happening here:
1) Your smartphone’s camera may not be well aligned to the telescope. This could be due to user error in the camera alignment process, or it could be due to the smartphone being bumped or otherwise shifted in the StarSense dock. To correct this, exit StarSense mode by pressing the StarSense icon button, then press the StarSense icon again to re-enter StarSense mode.
Next, select “Need Alignment” from the pop-up window, and go through the camera alignment process again. Be sure that whatever object you choose for alignment is centered in the telescope’s eyepiece. Then, in the camera view, carefully drag the crosshairs onto the same object.
If you are unsure how to align the camera, tap the Menu icon button and turn on the Camera Setup Assistant. Now, when you go through the camera alignment screens, there will be information and videos to walk you through the process.
2) The object may be in the telescope’s eyepiece, but it could be too dim to see. This is more likely when observing faint deep sky objects from light polluted or moonlit skies. In this case, we recommend going to darker skies or waiting until a New Moon to get a better view.
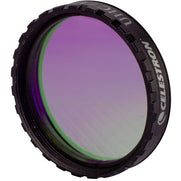
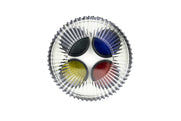
The objects listed in Tonight’s Best under the Star icon button will all be marked as either “CITY VIEWABLE” or “DARK SKY VIEWABLE.” Do not expect to be able to see any objects labeled “DARK SKY VIEWABLE” from light polluted or moonlit skies. You can also consider adding an optional light pollution reduction (LPR) filter, such as the Celestron UHC/LPR Filter - 1.25”.
The StarSense dock’s spring-loaded clamp holds my smartphone OK, but the holder itself is slipping relative to the rest of the dock. This causes smartphone to move, even when the adjustment knobs are not being turned, disturbing the camera alignment. How can I prevent the holder from slipping on the dock?
There are three screws that adjust the tensioning for each axis of motion of the holder on the StarSense dock. Tighten these screws with a small Phillips screwdriver until the holder does not slip. Do not overtighten these screws or the adjustment knobs will become difficult to turn.
We recommend removing your smartphone from the dock and removing the dock from the telescope before making these adjustments.
- To adjust the Y-axis tensioning, first turn the X-axis adjustment knob counterclockwise as far as it will go. This moves the holder to the far right and better exposes the three screws needing adjustment. Then, tighten the three Y-axis tensioning screws shown in the image below.

- To adjust the X-axis tensioning, adjust the three X-axis tensioning screws shown in the images below. You’ll need to turn the X-axis adjustment knob clockwise as far as it will go to move the smartphone holder all the way to the left to access all three of the adjustment screws.


When centering the camera over the StarSense dock’s mirror using the X-Y adjustment knobs, no matter how well I center my camera over the mirror, the edges of the camera’s field of view are still cut off (i.e. black). Is this OK?
Yes, this is OK. Some of today’s smartphone cameras have exceptionally wide fields that will not fit entirely within the StarSense dock’s mirror. However, this does not affect performance of the StarSense Explorer because the camera can still see plenty of sky to determine its current pointing position.
When I stop moving the telescope and wait several seconds, the bullseye is not consistently changing from red to either yellow or green OR when I first start the app, the bullseye remains red and the pointing arrows do not appear. The status messages say plate solving is unsuccessful and the app can’t find objects as a result. What’s going on?
When the bullseye does not change from color red, the smartphone camera is not successfully “sensing” the sky and is not able to determine its pointing position. There are several possible reasons for this:
- The sky may be too cloudy or hazy. Unfortunately, there’s not much that can be done about this beyond waiting for a clearer night to observe. As general rule, if you can’t see many stars with your eyes, then conditions will likely not permit the camera to “see” enough stars, either.
- It may not be dark enough out. You’ll need to wait at least an hour after sunset for StarSense Explorer to be able to “see” enough stars to find its position. If you can’t see many stars with your eyes, it is not dark enough yet.
-There may be a bright light source, like a streetlight, shining into the StarSense dock’s mirror. To combat this, move to an area that is shielded from nearby lighting sources.
- There may be something in the camera’s field of view that is affecting the phone’s ability to “sense” stars, such as power lines, trees, or the edge of a building. Try moving to an area with a clearer view of the night sky, without interference from anything on land.
- The Moon may be very bright in the night sky. The Moon’s big, bright disc can blind StarSense Explorer so that it cannot locate objects near the Moon. To see if this is the problem, try selecting another object to view in a different part of the night sky. Also, keep in mind that any deep-sky objects will appear washed out when the Moon is bright in the night sky. The best nights to observe are when the Moon is in or near the New Moon phase.
- The camera may not be properly centered over the StarSense dock. If it is not properly centered, the dock will block the camera’s view, preventing StarSense Explorer from “sensing” enough stars. Fix this by exiting StarSense mode and pressing the StarSense icon button. Then press the StarSense icon again to re-enter StarSense mode. Select “Needs Alignment” from the pop-up window and go through the camera alignment process again. Use the X-Y knobs on the StarSense dock to precisely center the smartphone camera over the dock’s mirror.
- The smartphone’s camera may be picking up getting stray reflections off the back of your phone. This can occur with smartphones or smartphone cases with reflective, shiny metallic, or mirrored backings. Stray light near the observing site reflects off the back of the phone, into the mirror, and then into the camera. If this occurs, try placing the phone in a non-reflective case and be sure there are no nearby light sources that can reflect off the back of the smartphone.
- There may be dew on the StarSense dock’s mirror. When the ambient outside temperature is close to the dew point for your location, dew may start to form on the mirror, preventing the smartphone’s camera from seeing the sky. If this occurs, gently wipe the mirror surface with a clean tissue (without lotion!) or a soft cleaning cloth until the mirror is dry and free of dew. The reflective surface is on the underside of the mirror glass, so you cannot damage the reflective coatings from wiping or cleaning the mirror. Under heavy dew conditions, you may need to do this several times during an observing session.
Is there a way to access the Object Info pages from the planetarium view?
Yes. Press the orange rectangle with the selected object’s name in it at the bottom of the screen. The Object Info pages for the selected object will appear.
Once StarSense Explorer finds an object and I am observing it in the telescope eyepiece, the object appears to slowly drift out of the field of view over time. Why doesn’t the object stay centered in the eyepiece?
This is due to the rotation of the Earth. To compensate for this, you’ll need to periodically move the telescope very slightly to follow the object and keep it centered in the telescope.
The StarSense Explorer app will show the bullseye slowly drifting over time, until the bullseye is no longer on the object and is no longer color green. Simply move the telescope to re-center the bullseye on the object, wait until the bullseye turns green again, and the object will once again appear in the eyepiece’s field of view.
What is the difference between Celestron’s StarSense Explorer app and Celestron’s SkyPortal app?
The StarSense Explorer app only works with StarSense Explorer telescopes, as the app requires both the StarSense dock and the unlock code. The app is intended to curate and guide your astronomical observing experience with StarSense Explorer telescopes, which includes using StarSense technology to “sense” the stars and guide you to selected objects.
SkyPortal is a general-purpose astronomy app for observers of all skill levels, with or without a telescope. It is a free download and works great as a stand-alone planetarium app to explore and learn about the night sky.
SkyPortal can also be used to control Celestron computerized telescopes with Celestron’s SkyPortal WiFi module, or built-in WiFi functionality. When used with a computerized telescope, a device running the SkyPortal app replaces the telescope’s hand control.
When I am centering my smartphone’s camera over the StarSense dock, I’m noticing reflections and/or double images in the field of view. What’s going on?
The smartphone’s camera may be picking up getting stray reflections off the back of your phone. This can occur with smartphones or smartphone cases with reflective, shiny metallic, or mirrored backings. Stray light near the observing site reflects off the back of the phone, into the mirror, and then into the camera. If this occurs, try placing the phone in a non-reflective case and be sure there are no nearby light sources that can reflect off the back of the smartphone.
I have an iPhone 6 or an Android device. StarSense Explorer is finding objects without problems, but I notice the bullseye drifting off target in the app while the object is still centered in the telescope’s eyepiece. What’s going on?
This is a known issue with the gyro/accelerometer sensor in the iPhone 6. It is reporting slight motion of the telescope when, in fact, the telescope is not moving. The bullseye will correct its position onscreen after the next successful plate solve, so the drifting should not prevent the app from successfully locating objects. We have seen this “gyro drift” issue sporadically in some Android smartphones, too.
What do the astroimages captured by StarSense Explorer look like? I notice there is an option called “Save Images & Logs” in the Menu. Can I save and view the images captured by StarSense Explorer?
The images captured by your smartphone that StarSense Explorer uses to determine its current pointing position are not “astroimages” in the traditional sense. Mostly, they look like somewhat noisy black screens with white dots (stars) visible within the frame. They are not pretty pictures by any means! You will not be able to see any deep sky objects in these images, and planets will just appear like slightly bigger white dots. The Moon will be a big, overexposed blob! Even so, StarSense Explorer can pull out enough astrometric data from the image to determine where the telescope is pointing.
For example, here is a typical image from StarSense Explorer when used with an iPhone X:
It is possible to access these images by selecting “Save Images & Logs” from the Menu icon at the bottom left of the main screen before using StarSense Explorer. The app will then save the images it captures and they can be accessed later. We have provided access to the images so that they can be used for troubleshooting purposes. If you are having problems finding astronomical objects in the night sky using StarSense Explorer, these image and log files can help the Celestron Tech Support Team diagnose the issue. We recommend turning on “Save Images & Logs” only if you are having problems with StarSense Explorer and need to troubleshoot. Otherwise, the images will fill up the memory storage on your smartphone. To retrieve the image and log files, follow the steps below.
Retrieving Images & Logs – Android
Turn on “Save Images & Logs” from the Menu as described above. After you use StarSense Explorer at night, there will be images and log files stored on your phone. Accessing them requires connecting your smartphone to a computer. To retrieve the files:
1) Connect your Android smartphone to a computer with the appropriate USB cable.
2) Open the File Explorer on your computer, and the smartphone should appear. 
3) Select the device, then select “Phone”, then select “Pictures”, then “StarSense Explorer”
4) Select all the files shown in the “StarSense Explorer” folder and copy them to a folder on your computer.
Retrieving Images & Logs - iOS
Turn on “Save Images & Logs” from the Menu as described above. After you use StarSense Explorer at night, there will be images and log files stored on your phone. Accessing them requires connecting your iPhone to a computer that has iTunes. Follow these steps to retrieve the files:
1) Connect your iPhone to a computer with a USB Lightning cable.
2) Open iTunes on your computer.
3) Click the smartphone icon on the upper left side of screen. 

4) Select all the files shown in the “StarSense Documents” section and copy them to a folder on your computer.
If you examine the images, it may be easy to determine what is going wrong. Here are some examples:
- Camera not centered over StarSense dock’s mirror:
- Building in field of view: 
-Trees in field of view: 
-Power Lines in field of view: 
-Clouds in field of view: 
-Bright Moon in field of view: 
-Moon and Haze in field of view: 
-Bright lights and reflection in field of view: 
I’m in dark skies, and my smartphone screen is too bright. It is affecting my eyes’ ability to dark adapt, and I can’t see deep sky objects very well as a result. What can I do?
First, turn your smartphone’s screen brightness all the way down. If it is still too bright, turn on Night Vision mode, which is accessed from the Menu icon. This causes the app to emit red light only, which won’t affect your eyes’ ability to dark adapt.
I looked at Tonight’s Best list of objects earlier in the day to plan my observing session and some of the objects highlighted earlier are no longer visible. What went wrong?
The Tonight’s Best list highlights the objects that are visible now. So, if you look at the list during the day, some of the objects listed may move below the horizon later in the evening. Take note of the set times for the objects in the list; this information can be found to the right of the object listing on the Tonight’s Best page.
If the StarSense Explorer app and StarSense dock essentially turn my smartphone into a “smart finderscope,” why do the telescopes include a StarPointer red-dot finderscope?
The StarPointer is included for several reasons. First, it helps facilitate camera alignment. During the alignment procedure, you must first center an object in the telescope’s low-power eyepiece. The StarPointer, once aligned to the telescope itself, makes it easy to do this. If you are proficient at pointing the telescope without use of a finderscope, then you may find that you do not need to use the StarPointer during camera alignment.
In addition, the StarPointer works well for pointing the telescope during daytime terrestrial use of the StarSense Explorer. It also is a handy at night, in case your smartphone battery should become drained or you choose not to use the smartphone functionality.
Can StarSense Explorer find astronomical objects to view, such as the Moon or Venus, during the day?
No. StarSense Explorer cannot find astronomical objects during the day. The daytime sky is much too bright for StarSense technology to work.
Can I change the date or time to see the sky for a different time other than now?
No. StarSense Explorer only shows the sky as it currently appears. This is to avoid any confusion when using the app to find objects in the night sky, as the date and time needs to be current for StarSense Explorer to work. The app automatically obtains the current date and time information from your smartphone.
SkyPortal, the free planetarium app from Celestron, does have the ability to change the date and time to display how the sky would look in the past or in the future. If this is a feature you would like to use for planning or exploration purposes, we recommend downloading SkyPortal.
In the main menu, I see there is a Location option that allows me to choose my current location. When would I need to use that?
When the app is first opened, it will ask you if StarSense Explorer can access the smartphone’s location services. If you answer yes, then the smartphone will automatically use your current location whenever it is used. If you answer no, then the location must be manually set using one of the Location options. (NOTE: You cannot use the “Choose Location from Map” option unless your smartphone can connect to the internet.) Keep in mind that if you select a location far away from your current location, StarSense Explorer will not work.
Can I use StarSense Explorer with a tablet?
No. A tablet is too big to fit into the StarSense dock.
I’d like to use the StarSense Explorer app with more than one smartphone. How many devices can I unlock with each unlock code?
Each unlock code can unlock up to 5 different devices. This will allow you to use the StarSense Explorer app on several smartphones and unlock the app if you upgrade to a new smartphone.
When I select the Menu icon, I notice there is a toggle to turn “Camera Setup Assistant” on or off. What does this do?
The Camera Setup Assistant will appear the first time you do a camera alignment. It walks you through each step of the smartphone camera alignment process and describes with text, images, and videos what needs to be done for each step. For subsequent camera alignments, the Camera Setup Assistant will not appear unless the option is turned on from the Menu.
I notice that my smartphone battery drains quicker than usual when I am using StarSense Explorer. Is that normal?
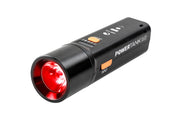
Since the smartphone is continually capturing images of the sky and processing them to determine the telescope’s current pointing position, StarSense Explorer uses more battery power than many typical astronomy apps. For observing sessions lasting more than a couple of hours, we recommend fully charging your smartphone beforehand and having a smartphone charger available to recharge the battery. Note that the StarSense dock holds the smartphone while still providing access to the smartphone’s charging port, so you can use a smartphone charger while StarSense Explorer is in use. The Celestron PowerTank Glow 5000 is an excellent choice because it offers a large capacity USB charge bank plus a red flashlight.
How do I zoom in or out using StarSense Explorer?
The planetarium view utilizes “pinch to zoom” technology. Pinch in to zoom out, and pinch out to zoom in.
I’m using an iPhone. When I press “Celestron Audio” on the Object Info page, I don’t hear anything, even if I turn my volume all the way up. How can I hear the audio presentation?
Toggle the ring/silent switch to the “silent mode off” position to hear the audio presentation.
I’m using an Android smartphone. I see “Advanced Camera Settings” as an option when I press the Menu icon. What do the Advanced Camera Settings do?
Advanced Camera Settings allow you to manually adjust camera settings like exposure time, focus, and gain. By default, this option is off, and should not normally be used. The only reason to turn the Advanced Camera Settings on and use them is if your Android smartphone is having trouble consistently sensing stars under favorable conditions. In this case, manually adjusting the camera settings may help you get better results, especially if you are using an older Android smartphone.
During the camera alignment procedure, you can make manual adjustments from the camera centering screen. Adjust the settings until you can see stars on the display screen.
I notice that StarSense Explorer doesn’t work as well when pointed close to the horizon. Why is that?
Atmospheric refraction and haze can interfere with StarSense Explorer’s ability to find objects within about 15 degrees of the horizon. We incorporated features into the StarSense dock to help StarSense Explorer perform better near the horizon, but how close to the horizon you can get depends mostly on observing conditions such as light pollution and haze. Keep in mind that these same atmospheric conditions can diminish image quality when viewing objects near the horizon through your telescope.
What effect can weather have on StarSense Explorer?
Of course, cloud cover, fog, or haze that obscures the stars in the sky can diminish StarSense Explorer’s ability to sense stars. Extremely windy conditions can also have an effect, since the StarSense Explorer app will not begin sensing stars if it detects motion of the smartphone. Very hot or cold temperatures will generally have no effect on StarSense Explorer, although your smartphone may not operate well in extremely cold environments. In very humid conditions, be aware that dew may form on the StarSense dock’s mirror and/or the telescope optics. For the best results in humid weather, we recommend occasionally wiping the dew off the dock’s mirror with a soft cloth, lens tissue, or plain unscented tissue.
There is a bright object to observe in the sky somewhat close to the horizon (like Venus, for example), but it does not appear in the Tonight’s Best list. Why is this object not on the list?
Objects less than 20 degrees from the horizon are not shown on the Tonight’s Best list because they typically don’t look as good as they do when they’re higher in the sky due to atmospheric refraction and haze. However, you can still observe these objects when they’re close to the horizon by selecting them from the planetarium view or from the Search menu.
There is a bright object to observe in the sky close to zenith (straight overhead), but it does not appear in the Tonight’s Best list. Why is this object not on the list?
The StarSense Explorer LT and DX mounts cannot point higher than about 70-75 degrees in altitude, so objects located higher than that are excluded from the Tonight’s Best list. To see these objects, you’ll need to wait until the Earth rotates and the objects move lower in the sky.
When I select the Search icon, then select one of the object lists (Messier Objects, for example), why are some objects grayed out while others are in white?
The objects that are grayed out are not currently above the horizon at your location. You can select these objects to peruse the Object Info, but you will not be able to locate them in your telescope right now. Consult the rise and set times listed under the object name to find out when it will be above the horizon.
When using StarSense Explorer in the Southern Hemisphere, do you have to manually set the app for Southern Hemisphere operation?
No, when using StarSense Explorer in the Southern Hemisphere, the app will already know your location and will adjust for Southern Hemisphere operation automatically.
The camera alignment process requires aligning the smartphone’s camera to the center of the telescope’s field of view. How is this done?
Aligning the camera to the telescope is an easy, two-step process. The first step is centering the smartphone’s camera over the StarSense dock’s mirror. You can do this indoors, during the day, or at night. Simply turn the StarSense dock’s X-Y adjustment knobs until the camera can see the entire field of view in the dock’s mirror. Next, move the telescope to center an object in the telescope’s low-power eyepiece. You can use just about any distant object: a house light or streetlight on the horizon, a treetop, or a bright sky object, like Venus. Next, drag the crosshairs that appear in the camera’s field of view onto the precise spot that the telescope is currently centered on. That’s it! The smartphone camera is now aligned to the telescope and is ready to be used to locate objects in the night sky.
Do I need to align the smartphone camera to the telescope every time I place the smartphone in the StarSense dock?
For the most accurate telescope pointing, it is a good idea to align the smartphone camera and telescope every time the smartphone is removed and replaced in the StarSense dock. However, if the smartphone is properly seated in the StarSense dock, it likely will not absolutely require re-alignment to find objects. Note that if you choose not to realign, objects may not be well-centered in the telescope’s field of view.
Is the StarSense dock sold separately?
No, Celestron does not offer the dock separately. For the best performance, our engineers have designed the dock as an integrated part of the telescope optical tube and/or mount. Should you purchase the dock separately from a third party or make your own modifications to install a dock on another telescope, neither the dock nor the telescope will be covered by the standard Celestron warranty, as the product will have been modified.
What should I do if dew forms on the StarSense Dock’s mirror?
The StarSense Dock mirror’s reflective coating is on the underside of the glass. That means that if any dew forms on the glass, you can safely wipe it away using a soft cloth. Use a light touch to prevent the phone platform from moving. If the platform moves, you should recalibrate before locating more objects. Alternatively, some amateur astronomers use hot air blowers (such as a hair dryer) to keep their optics free from dew in heavy dew conditions. The same method will work on the StarSense Dock mirror.
Should I replace the cover over the mirror between searching for targets?
No, only place the cover on the StarSense Dock mirror when the scope is being stored. When using the telescope with the app, leave the cover off. Avoid snapping the cover on and off the dock mirror to prevent accidental nudging of the phone platform. If the platform moves during an observing session, you will need to recalibrate the camera before proceeding.
Why doesn’t my red dot finderscope match the image on the box/website?
Celestron is making a change to the finderscope shipped with some Celestron telescopes. In some cases, you may receive a finderscope that is different in appearance than the one pictured on the gift box, manual, Quick Setup Guide, or website. We apologize for any inconvenience this may cause. Rest assured that the finders are identical in performance and features. The main difference is the location of the battery compartment and, therefore, the battery installation instructions.
If your red dot finderscope looks like the unit pictured here, you can ignore this message. 
If you received a red dot finderscope that looks like the unit pictured here, follow the instructions below to replace the battery: 
1. The battery compartment on this finderscope is located on top of the unit. Use a Philips-head screwdriver to loosen the screw holding the battery door closed. The screw is captured and will not fall out when you open the battery door. 
2. Lift the battery door open to expose the CR-2032 button battery.
3. With your fingernail on either side of the battery, pry the battery up and out of the battery compartment.
4. Place the new CR-2032 battery, positive (+) side up, under the two copper battery clips at the front of the battery compartment. 

5. Press the battery down to snap it into the plastic battery clips on the opposite side of the battery.
6. Close the battery door and tighten the Phillips-head screw to secure the door in place.

